MOTO
By enabling manual entry as a payment method, merchants can take payments by directly entering the card details on the payment terminal. The transaction is then processed securely from the terminal to the TWPayz gateway.
Manual entry is only available for merchants whose partners have the functionality enabled on their profile in the TWPayz Terminal Management System (TMS). If manual entry is not enabled, the payment method will not appear in the TWPayz payment application.
NOTE: To be able to use manual entry (also called MOTO), the option "Enable MOTO (Mail Order / Telephone Order) for the merchant" must be activated on the merchant profile in TMS (Terminal Management System)
If you have questions regarding the activation of this feature in TMS, please contact us.
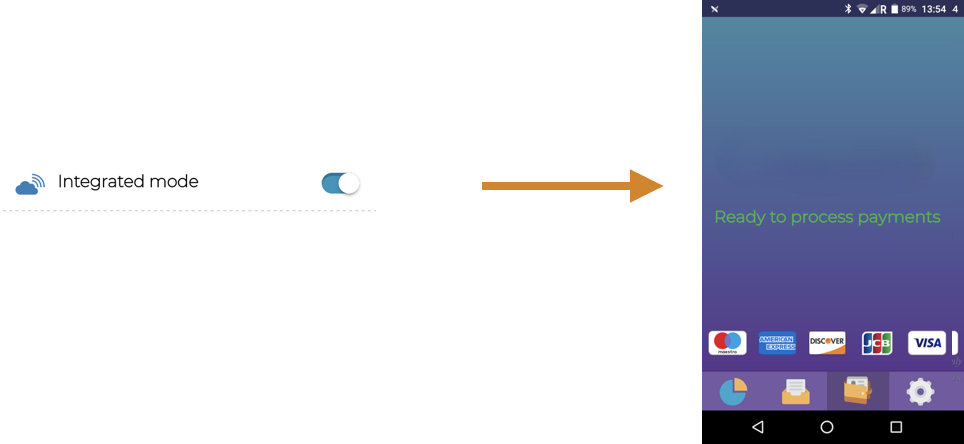
For the MOTO functionality to be visible in the TWPayz payment application it must be in standalone mode (as opposed to integrated mode)
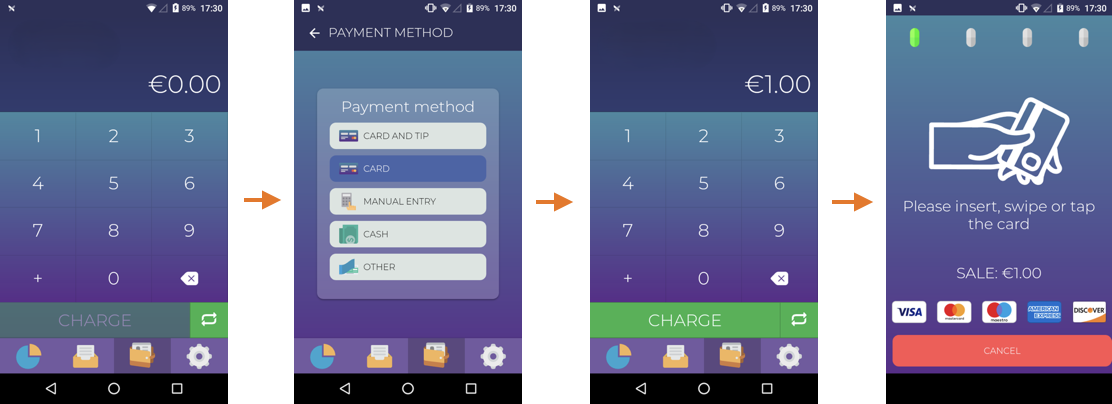
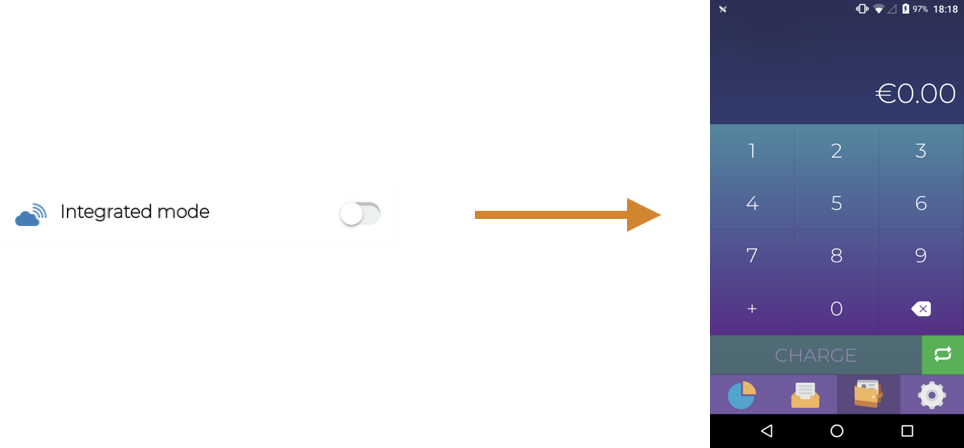
The digital keypad is your starting point to take manual transactions.
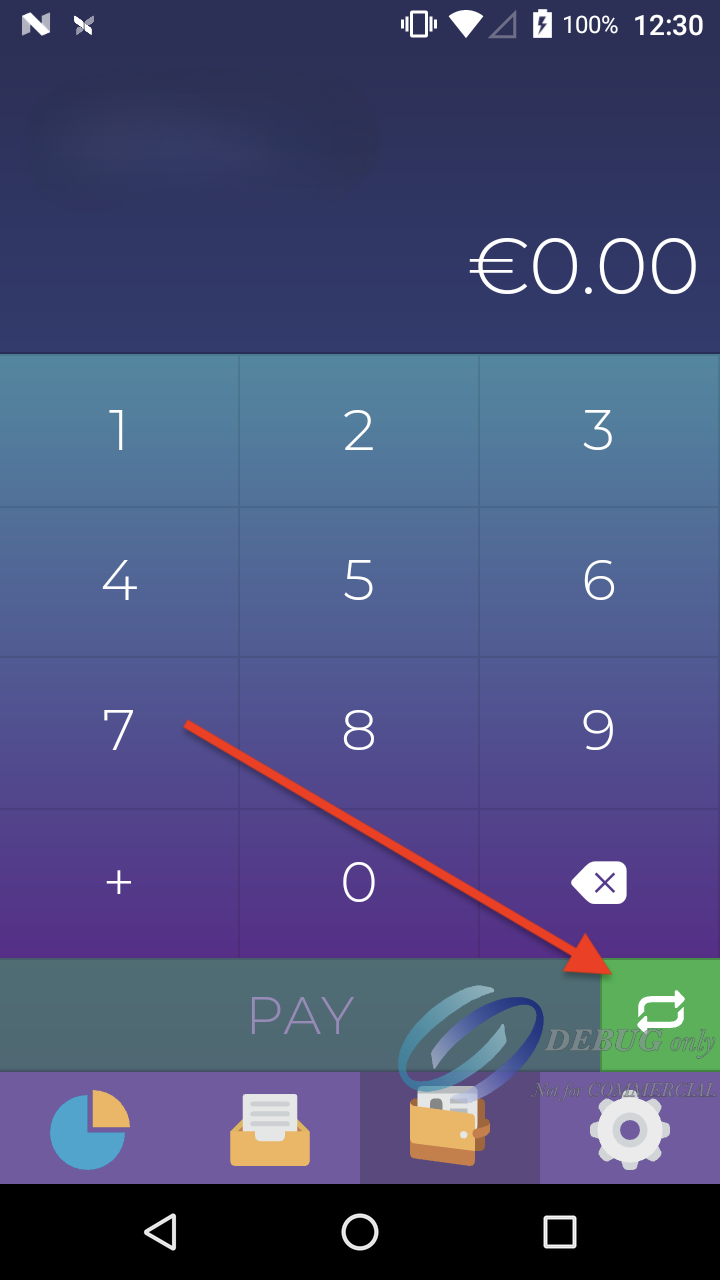
By default, the TWPayz payment application has Card Present transactions activated. To activate Manual Entry as a payment method, you need to click on the switch button.
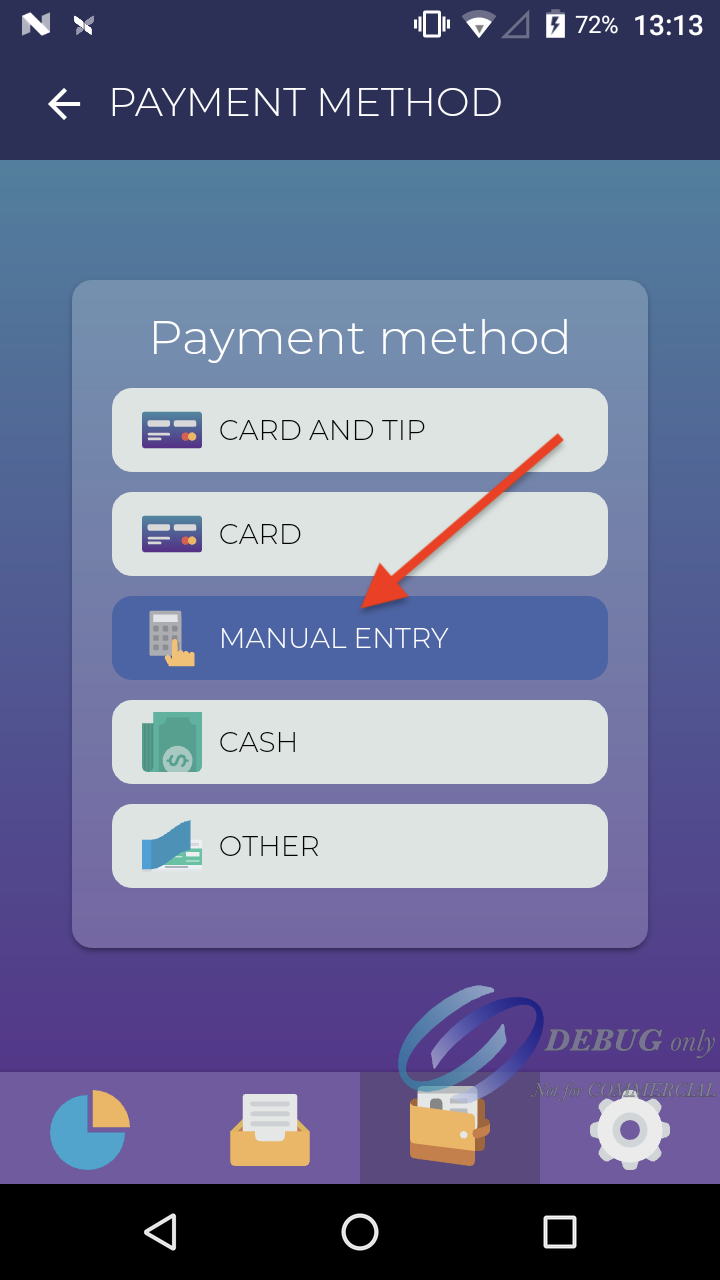
Multiple payment methods will appear, in order to start a manual transaction please select the “MANUAL ENTRY” option.
Input the amount of the transaction on the digital keypad and click the MANUAL ENTRY button
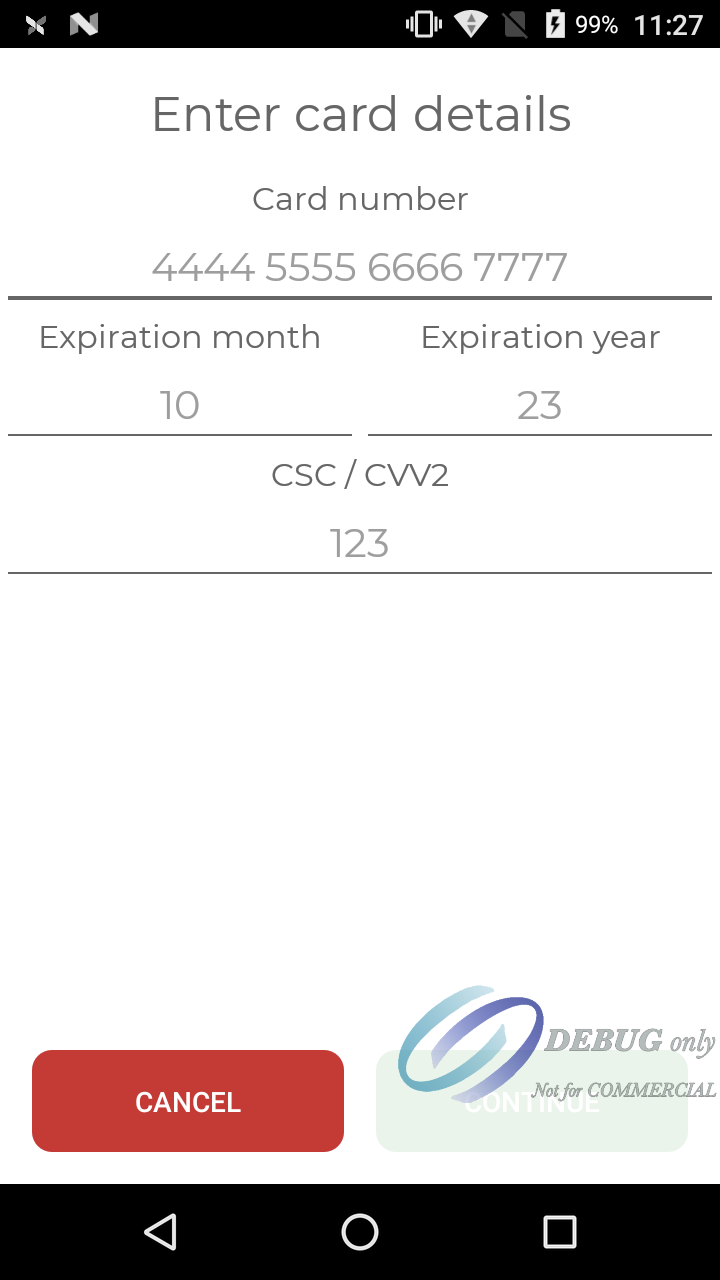
The following screen will prompt to enter the card details. All fields are mandatory, once the form is filled, click the continue button.
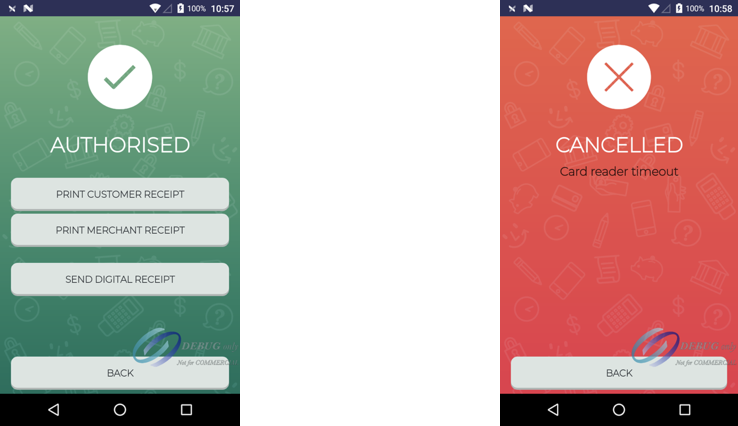
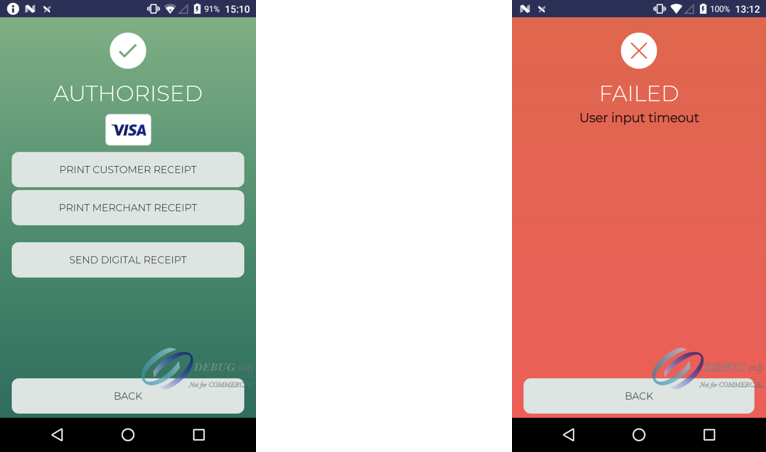
Depending on the outcome of the transaction, a success or decline screen will be prompted to the merchant.
Hiding/Enabling Payment Methods
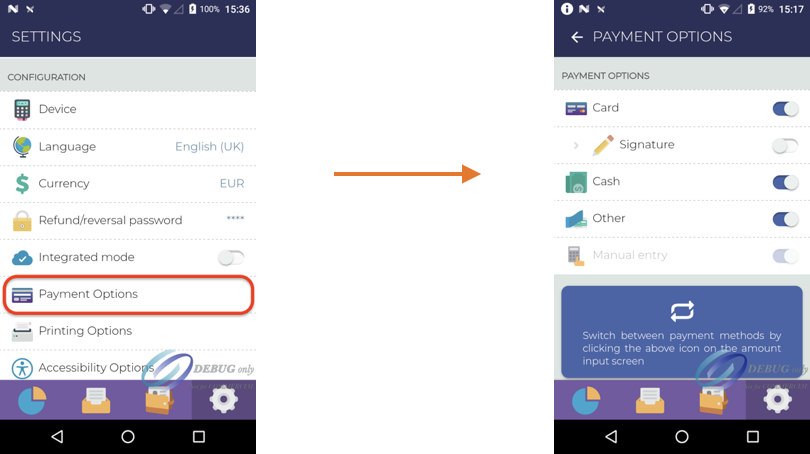
Hiding or enabling specific payment methods can be done through the Settings tab of the TWPayz payment application.
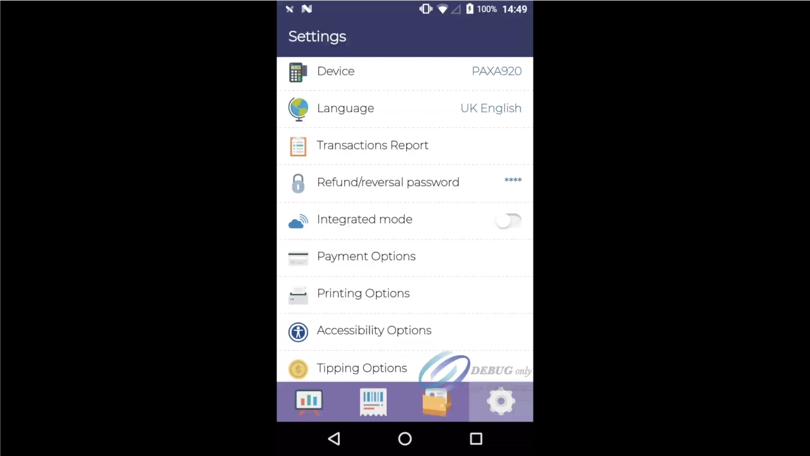
Scroll down and click on Payment Options, you will then be able to toggle on/off specific payment types.
Automatic Linked Refunds using MOTO
MOTO refunds are a wonderful option to make a refund without the cardholder having to be present.
A refund can be made in three different ways: Card, Manual Entry and Automatic (through Linked Refunds).
- Using Card will require a card to be inserted.
- Using Manual Entry will require to enter the card details.
Through the Automatic mode, using MOTO Linked Refunds behind the scenes, will be the easiest and fastest way to make a refund.
Note: Refunds can be done at any time after the original transaction. Based on the settings set by the service provider, the refund option might not appear in the application.
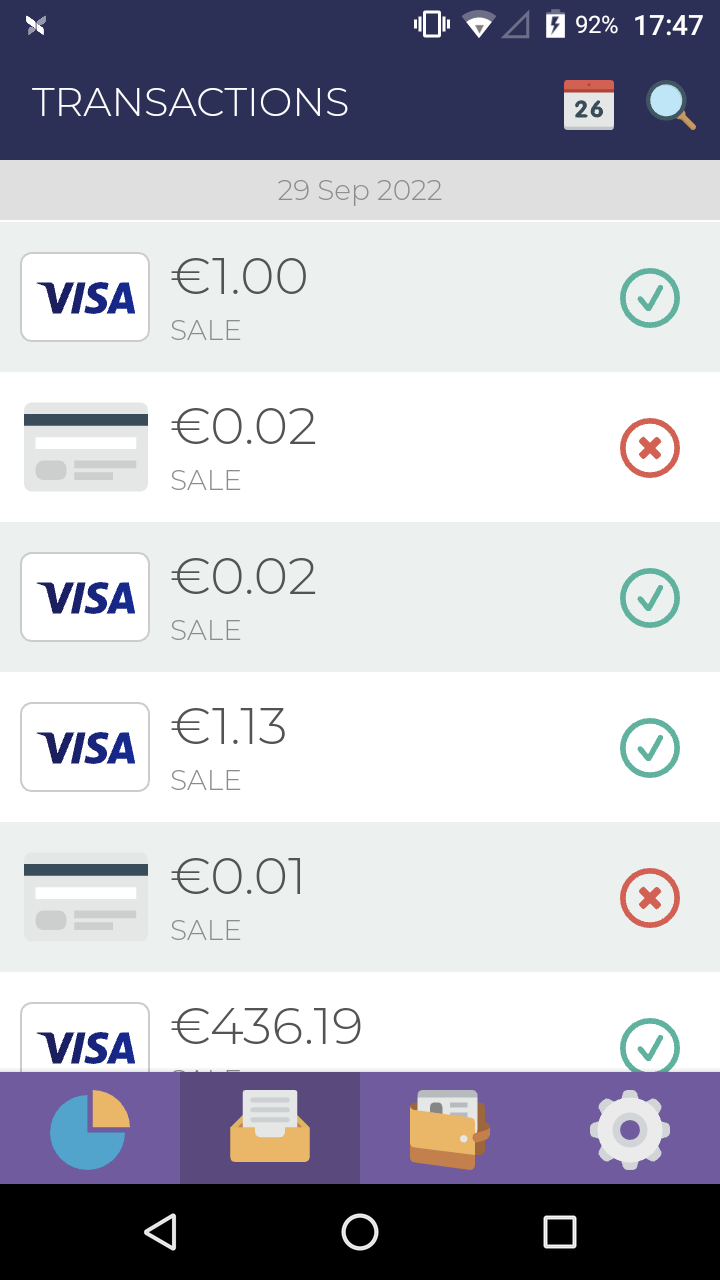
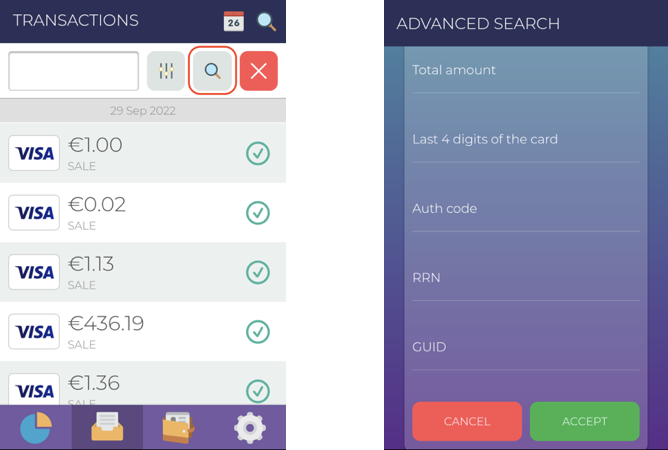
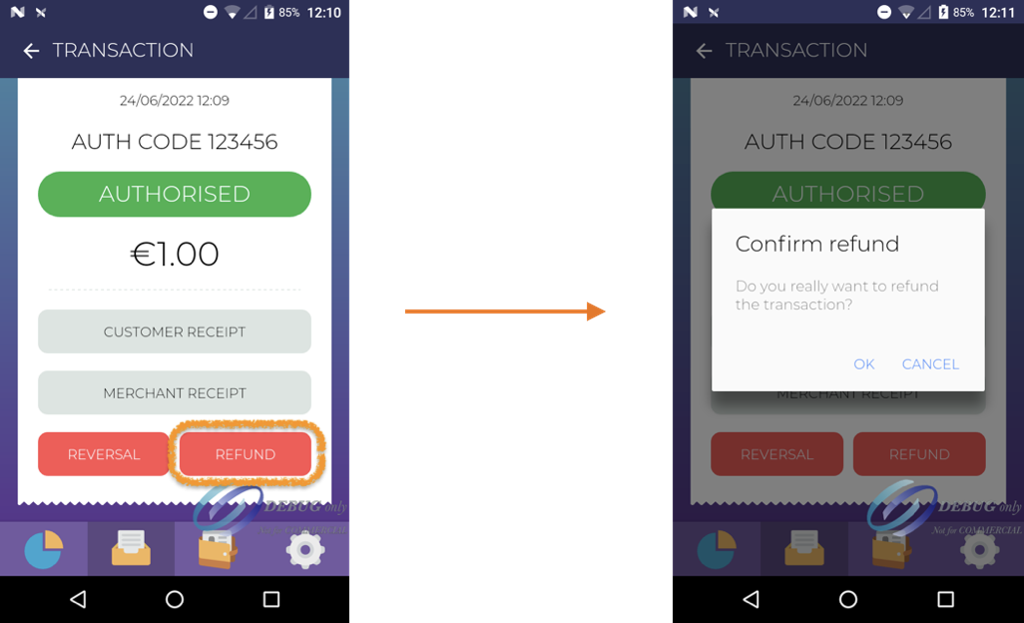
To make a Refund, you must go to the Transactions tab. Select the transaction for which you want to perform an operation and select Refund.
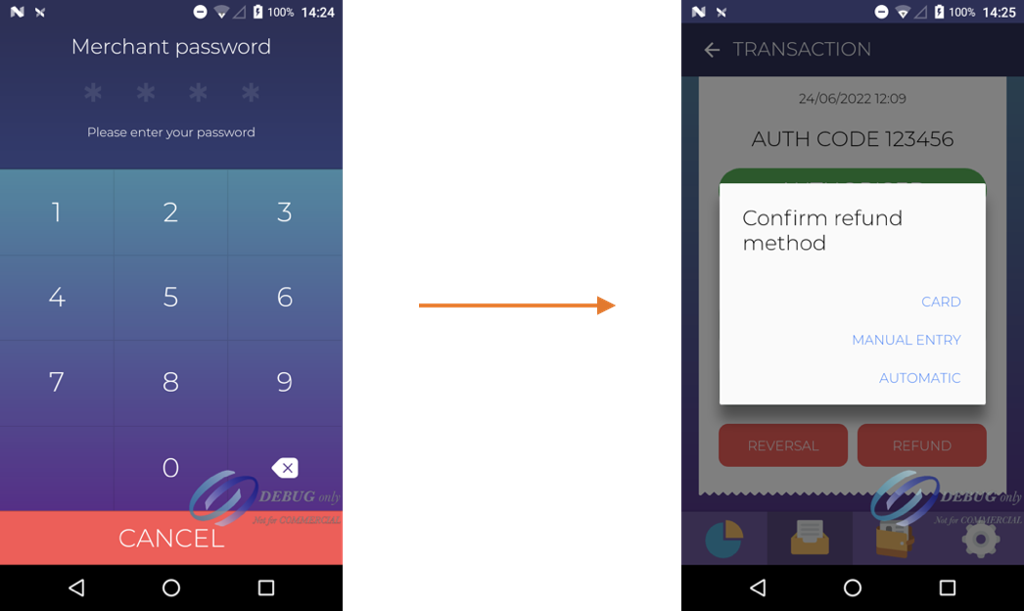
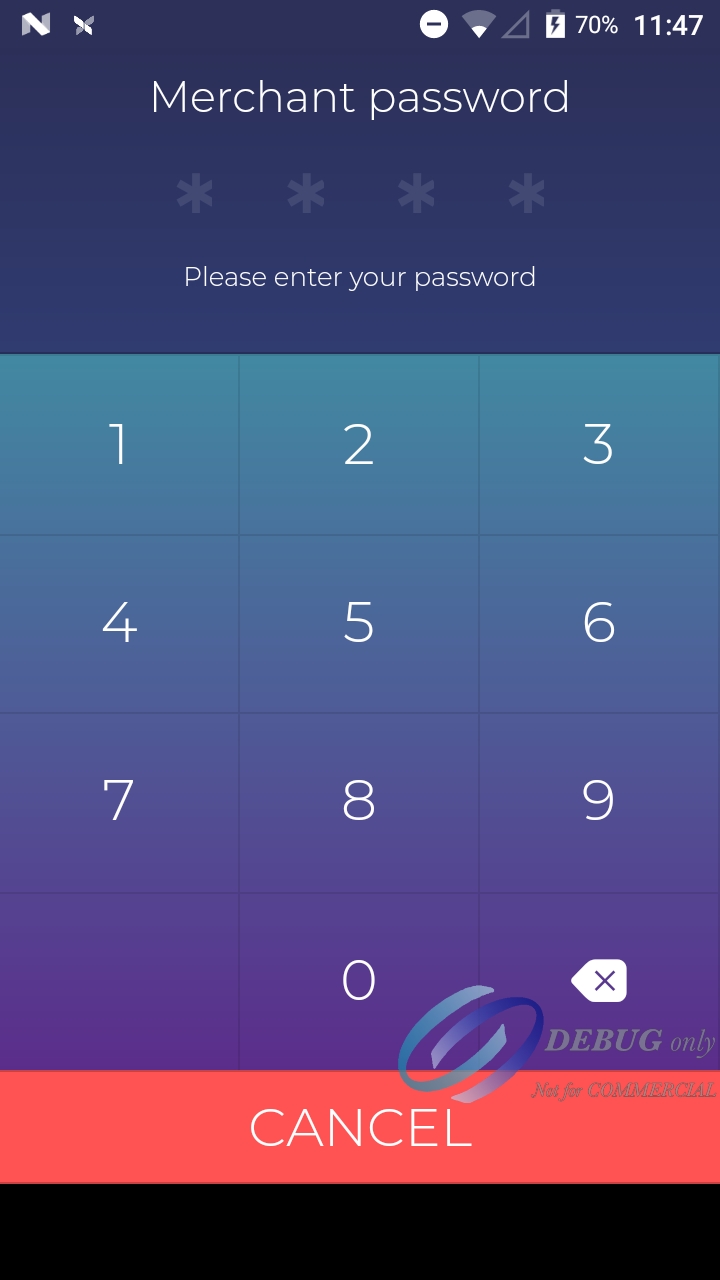
Introduce the Merchant password and confirm the refund method (Card, Manual Entry or Automatic):
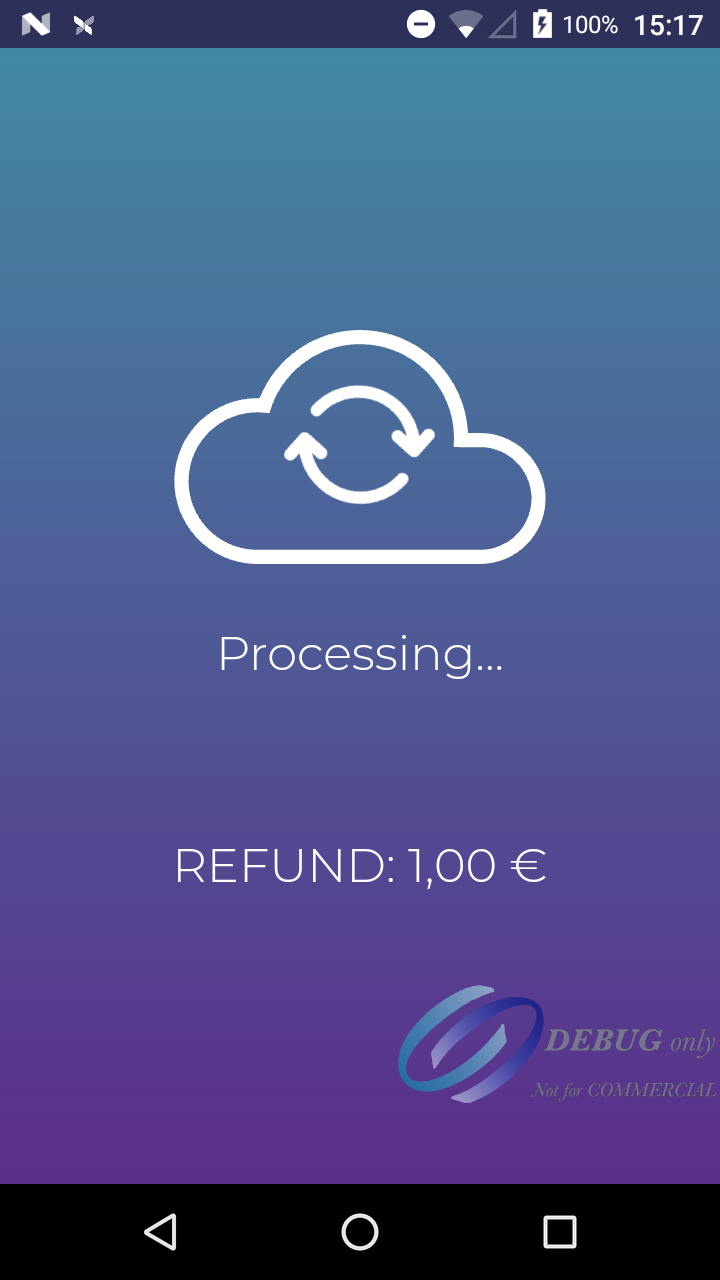
Select Automatic in the dialogue, you will not have to enter any card data or have the card physically, and the refund will be made:
Pre-Authorization
⚠️ Available from version 4.4.1 or higher of the TWPayz Payments app
A Pre-Authorization charge, also known as a pre-auth or authorization hold, is a temporary hold placed on a customer's payment card. It's used to verify that the account is valid and has sufficient funds to cover a pending transaction, without actually debiting the cardholder's account upfront.
A pre-authorized transaction can be increased or decreased (Pre-Auth Increase), can be captured (Pre-Auth Capture) and can be fully released (Pre-Auth Reversal). It is also possible to carry out a Pre-Authorization through MOTO (Manual Entry).
NOTE: To be able to use Pre-Auth, the option "Enable pre-auth for the merchant" must be activated on the merchant profile in TMS (Terminal Management System)
If you have questions regarding the activation of this feature in TMS, please contact us.
For the Pre-Auth functionality to be visible in the TWPayz payment application it must be in standalone mode (as opposed to integrated mode)
The digital keypad is your starting point to take Pre-Authorizations.
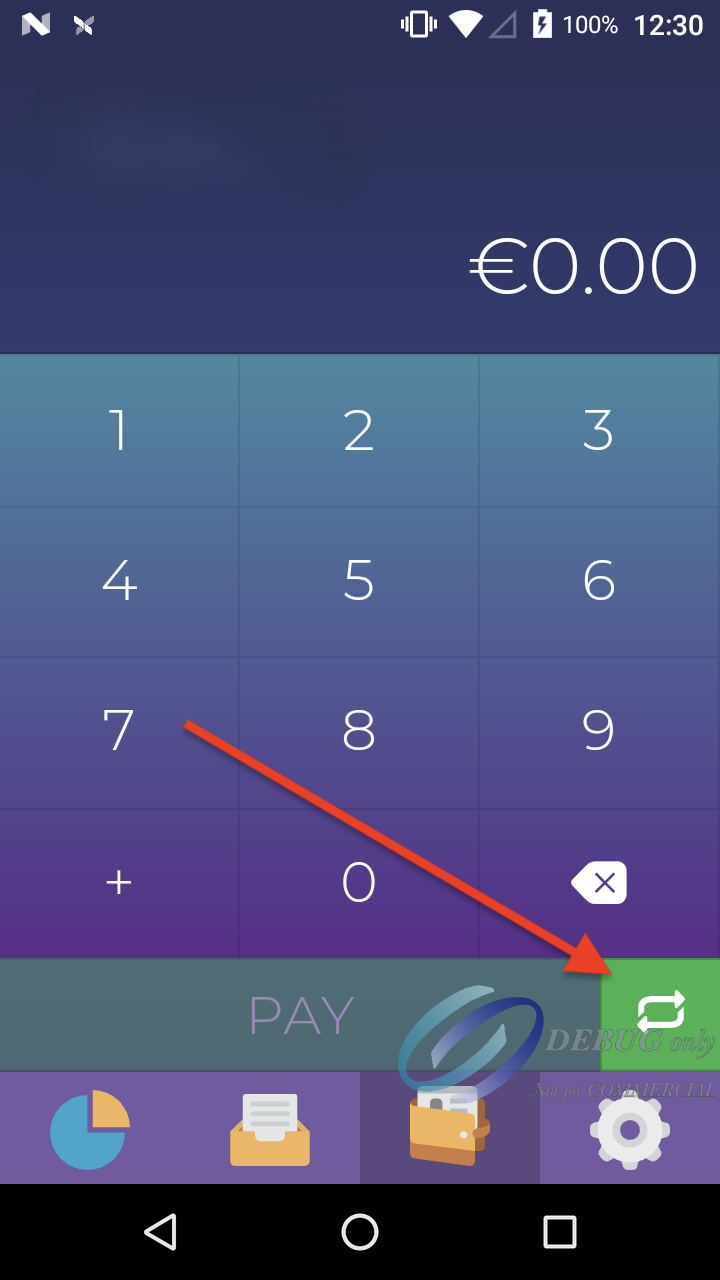
By default, the TWPayz payment application has Card Present transactions activated. To use Pre-Auth, you need to click on the switch button.
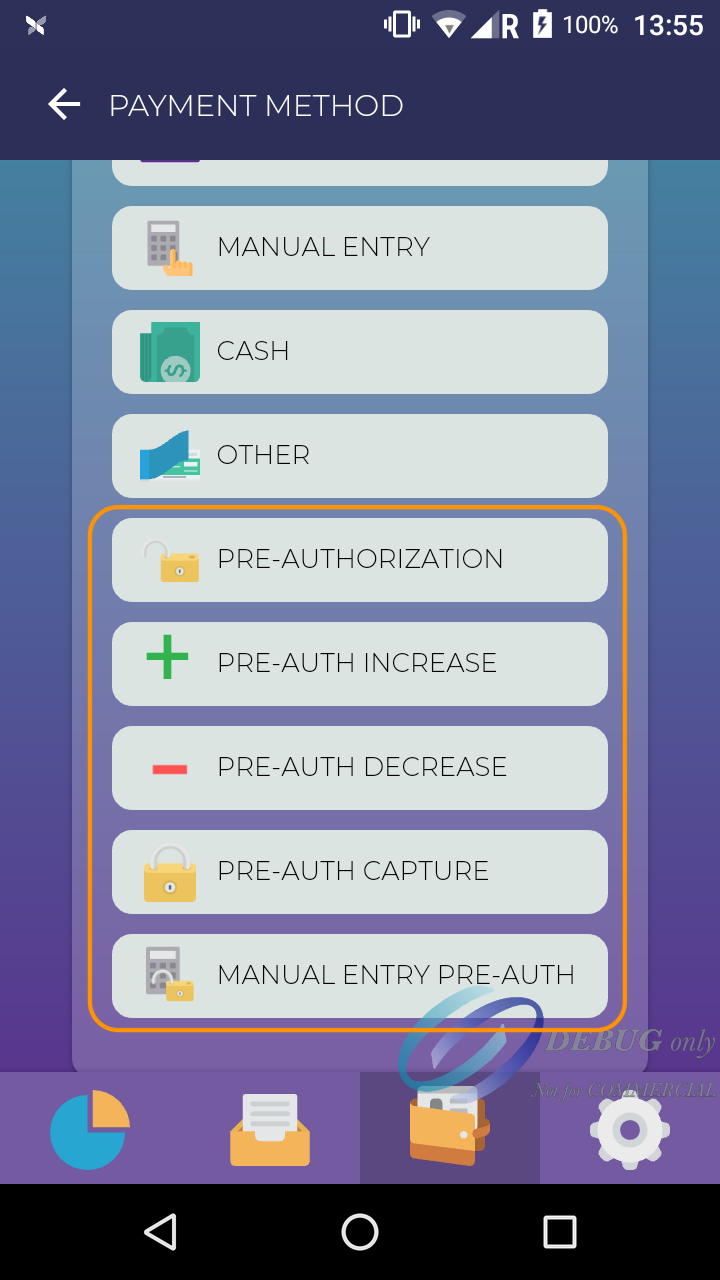
Multiple payment methods will appear, to start a Pre-Auth (Pre-Authorization, Pre-Auth Increase, Pre-Auth Decrease, Pre-Auth Capture, Manual Entry Pre-Auth [if MOTO is enabled for this merchant]). Pre-Auth Reversal will be possible by locating a Pre-Auth transaction in the Transaction History of the app.
Please select the desired option.
Pre-Authorization
It's used to verify that the account is valid and has sufficient funds to cover a pending transaction, without actually debiting the cardholder's account upfront.
Pre-Authorization Increase/Decrease
A pre-authorized transaction can be increased or decreased, for example, if a tab was opened and the consumer is adding new orders going above the initial pre-authorized amount.
- Increase (A Pre-Authorization Increase does not require a card to be inserted, swiped or tapped)
- Decrease (A Pre-Authorization Decrease does not require a card to be inserted, swiped or tapped)
Pre-Authorization Capture
A pre-authorized transaction can be captured to debit the cardholder's account. Depending on the merchant category code, the capture needs to happen between 7 and 31 days after the original pre-authorization. If not captured the funds will be automatically released by the issuing bank.
(A Pre-Authorization Capture does not require a card to be inserted, swiped or tapped)
Pre-Authorization Reversal
A pre-authorized transaction can be fully released, for example, when renting a car, the pre-auth reversal allows the merchant to release the funds if the car is not damaged. The merchant password will be requested.
(A Pre-Authorization Reversal does not require a card to be inserted, swiped or tapped)
Manual Entry (MOTO) Pre-Authorization
Pre-Authorization is carried out through Manual Entry (MOTO). To be able to carry out this operation MOTO must be activated in TWPayz TMS at the merchant level.
Money Remittance (Money Send)
⚠️ Available from version 4.4.5 or higher of the TWPayz Payments app
NOTE: Money Remittance is only available for merchants whose MCCs are 4829 and 6540 and subject to specific acquirer requirements. The following steps only apply to MC transactions (Master Card).
If you have questions regarding the activation of this feature, please contact us
Standalone Mode
The digital keypad is your starting point for taking Money Remittance transactions.
By default, the TWPayz payment application has Card Present transactions activated. To use Money Remittance, you need to click on the switch button.
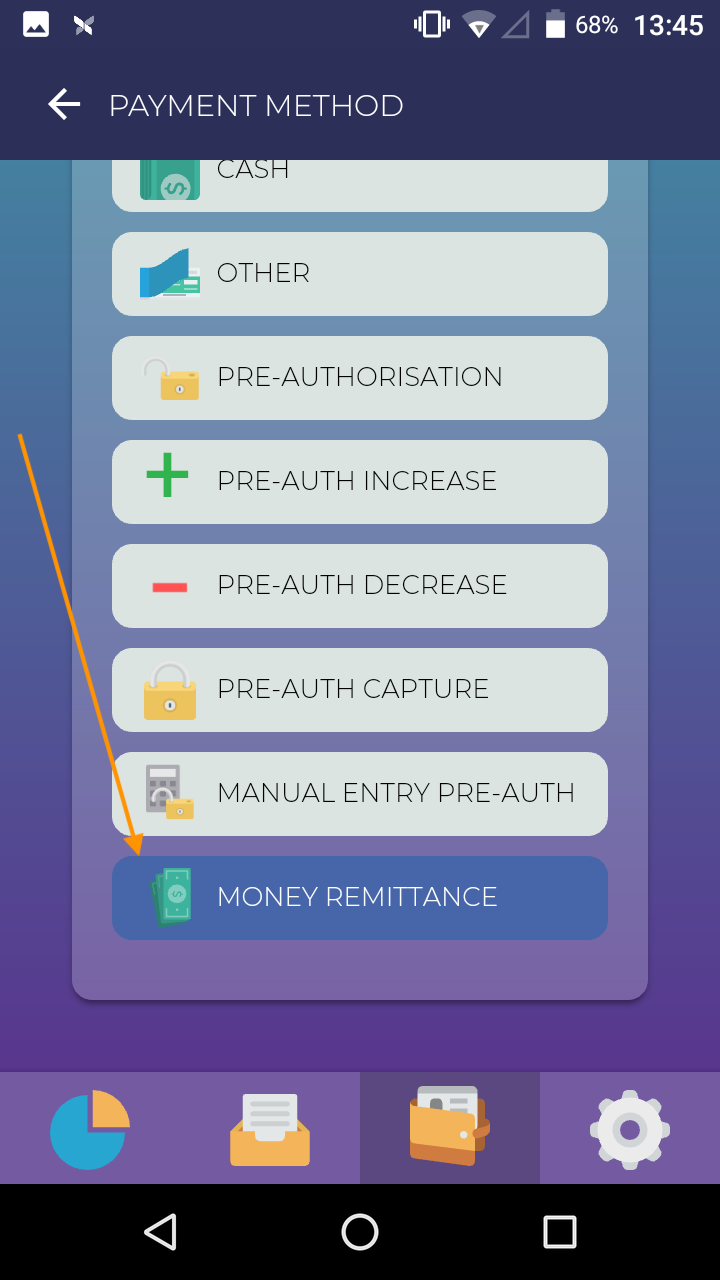
Please select the Money Remittance option.
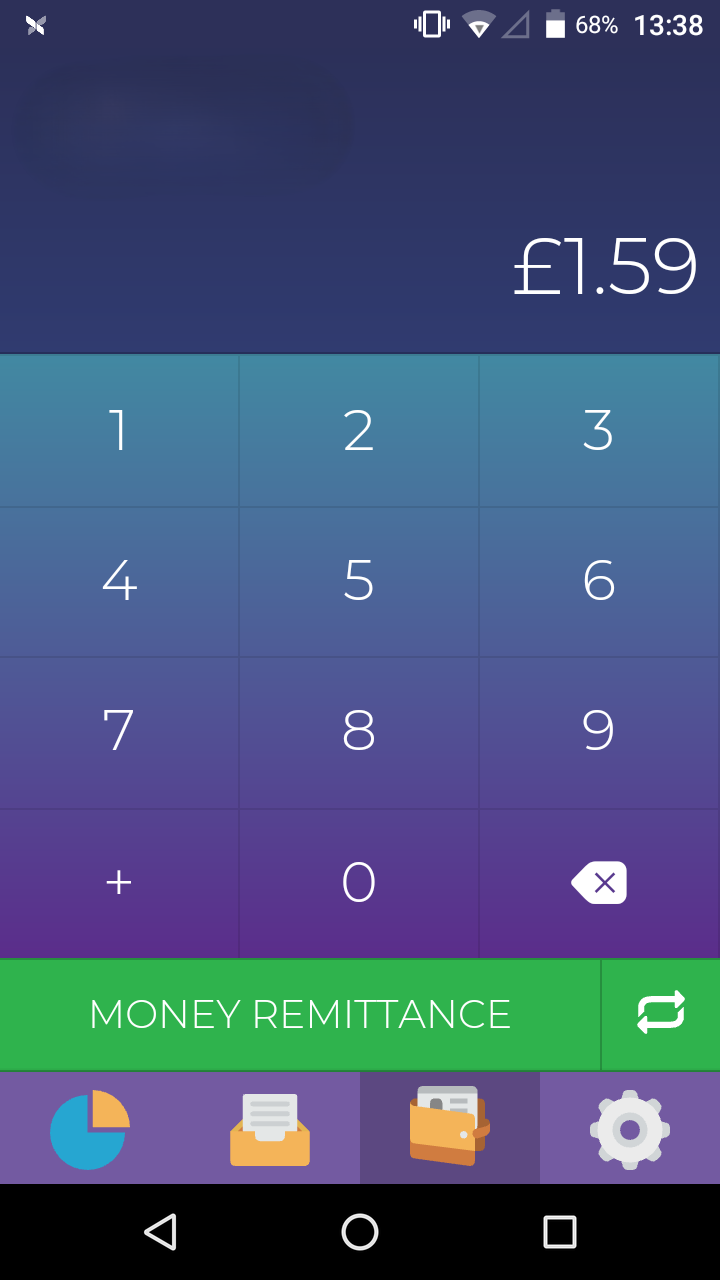
Introduce an amount and click on the Money Remittance button:
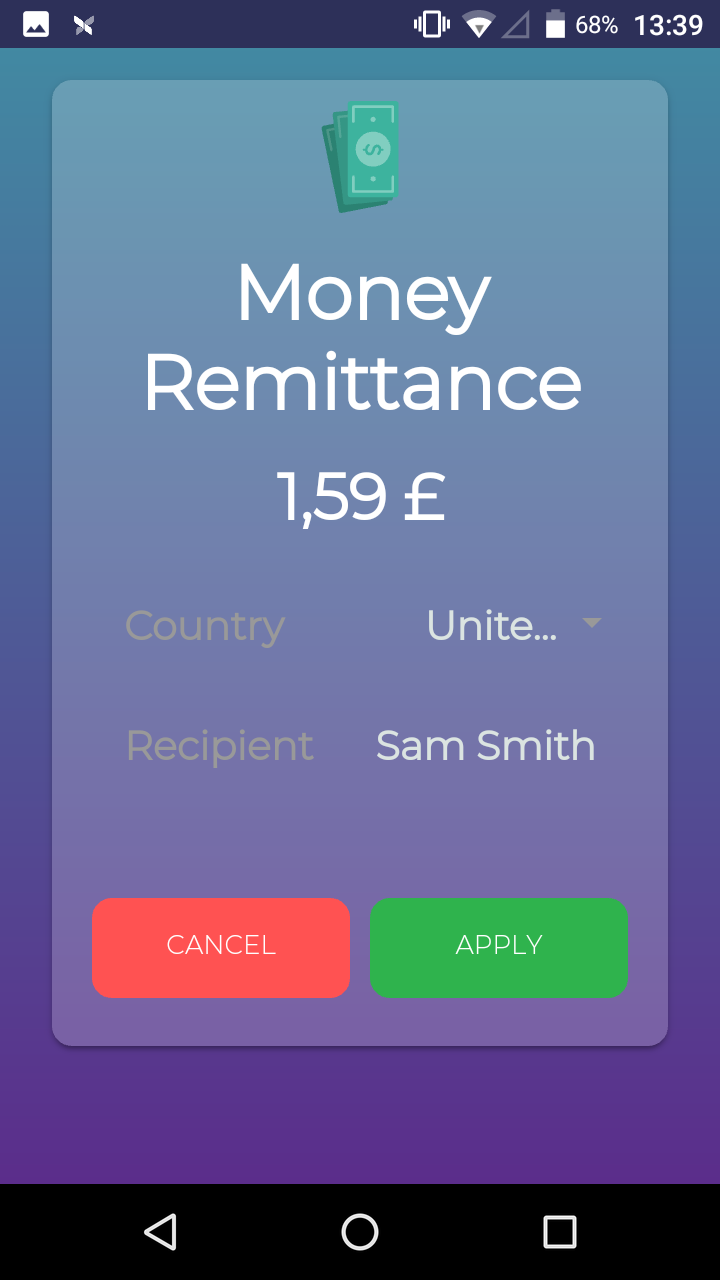
Select the Country and the Full Name of the recipient:
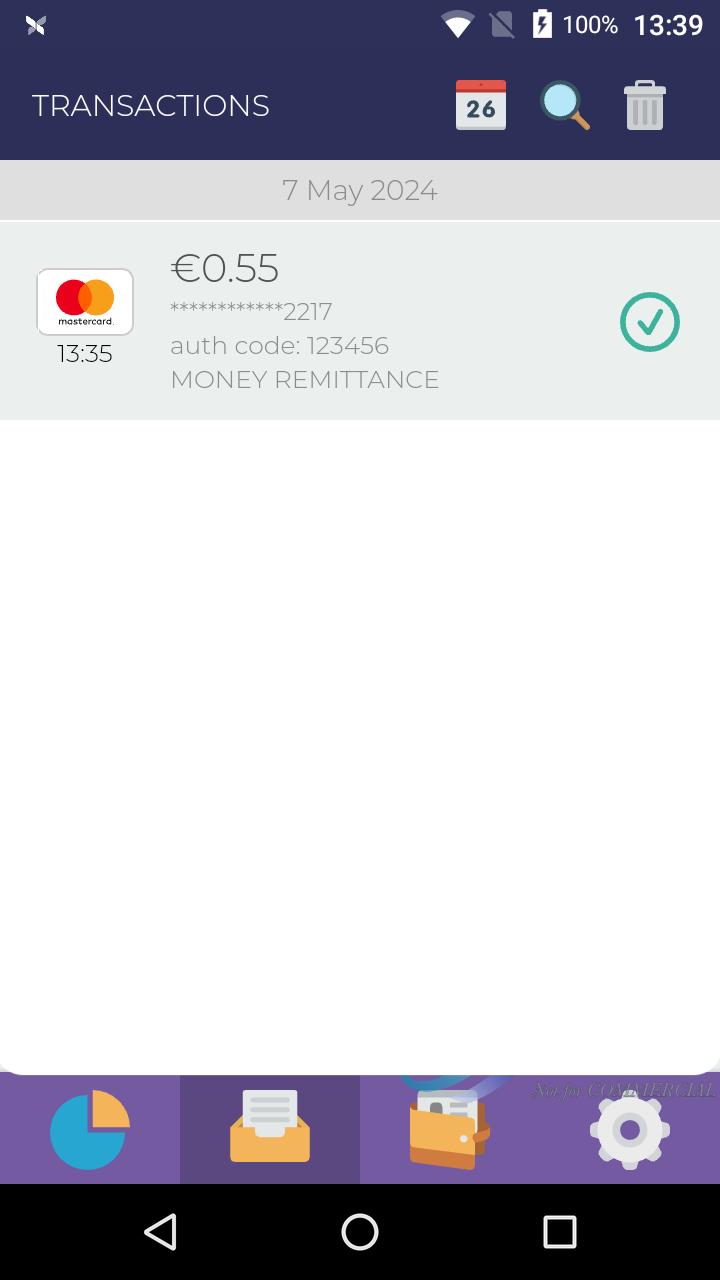
After taking the payment, the transaction will appear on the Transaction History of the app:
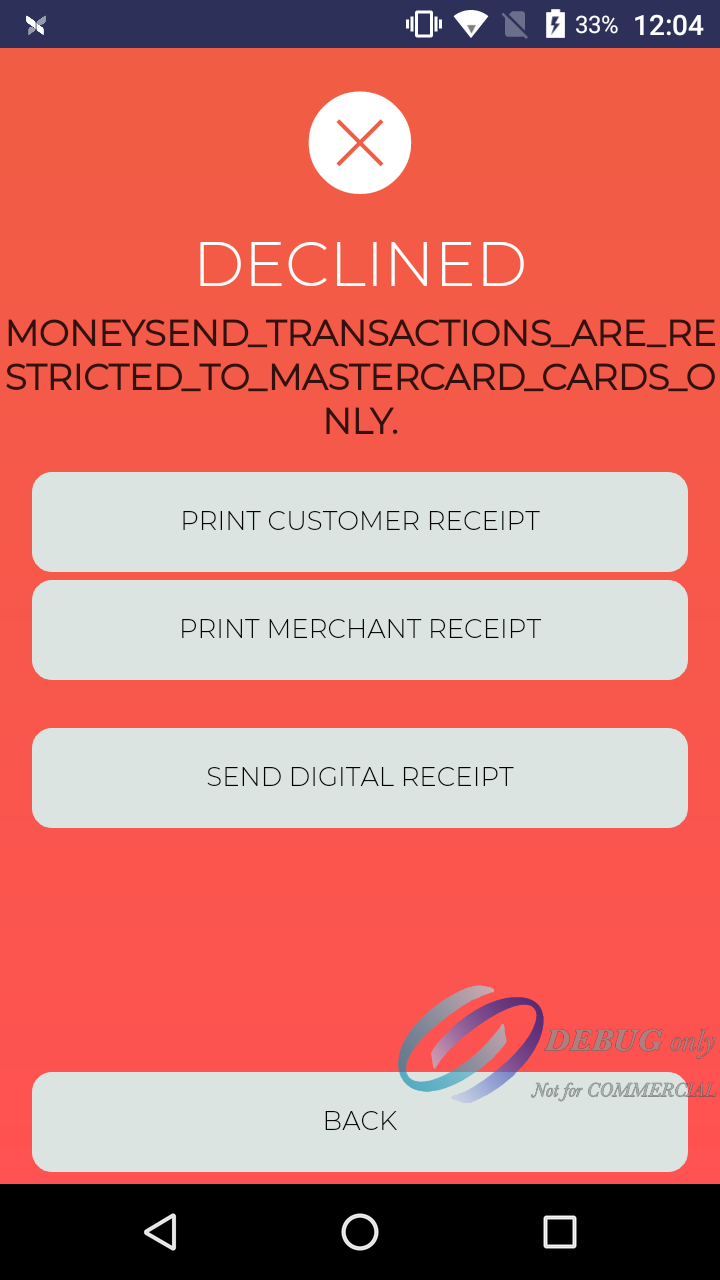
NOTE: If a card other than MasterCard was used in a Money Send (MasterCard) transaction, the following error message will appear:
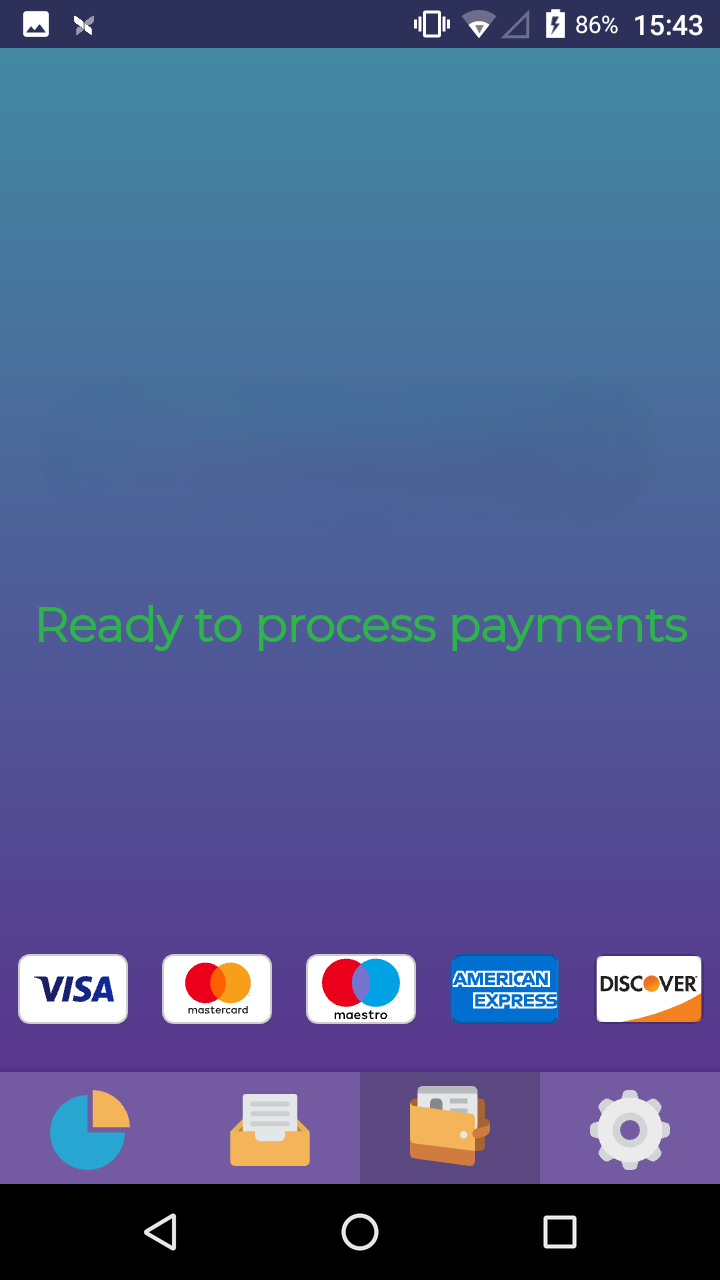
Cloud (Integrated) Mode
The digital keypad is your starting point for taking Money Remittance transactions.
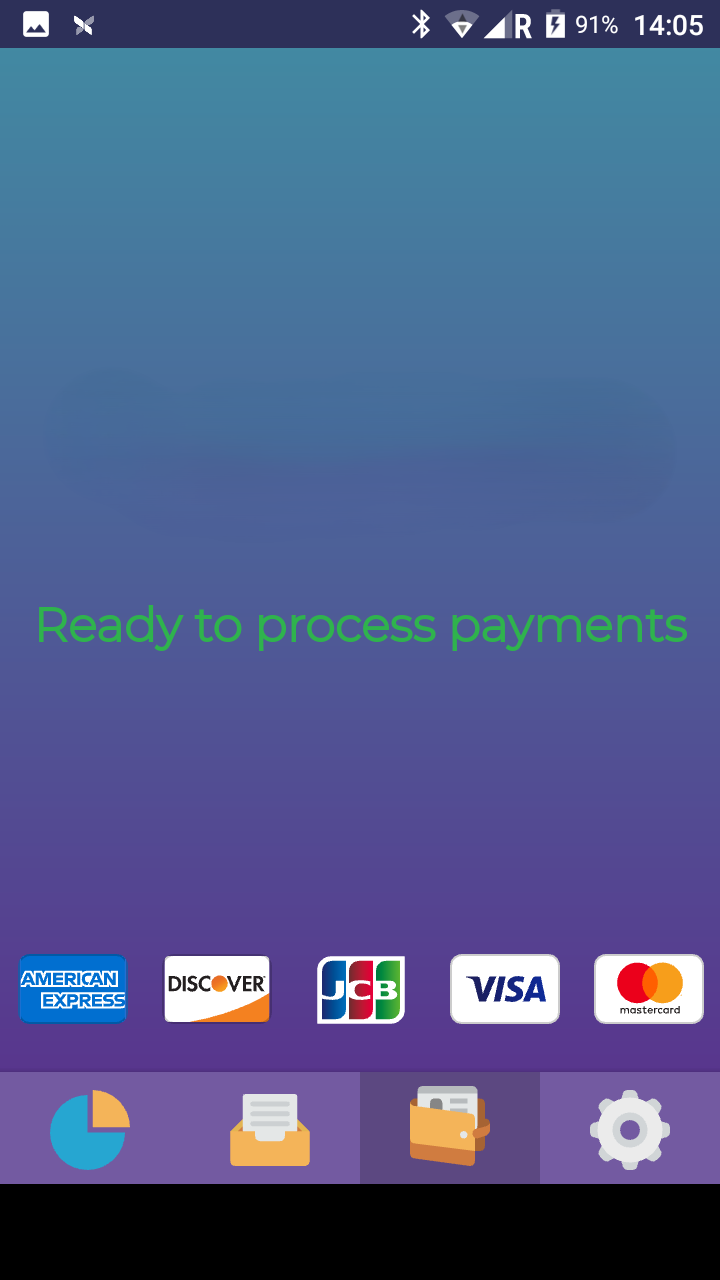
When the message "Ready to process payments" appears, it indicates that the reader is ready to begin a transaction.
After taking the payment, the transaction will appear on the Transaction History of the app:
NOTE: If a card other than MasterCard was used in a Money Send (MasterCard) transaction, the following error message will appear:
Kiosk Mode
The kiosk mode allows you to lock down the navigation within the payment application behind a merchant password. In kiosk mode, the user is only able to take a payment and can not navigate outside of the application.
Enable Kiosk Mode
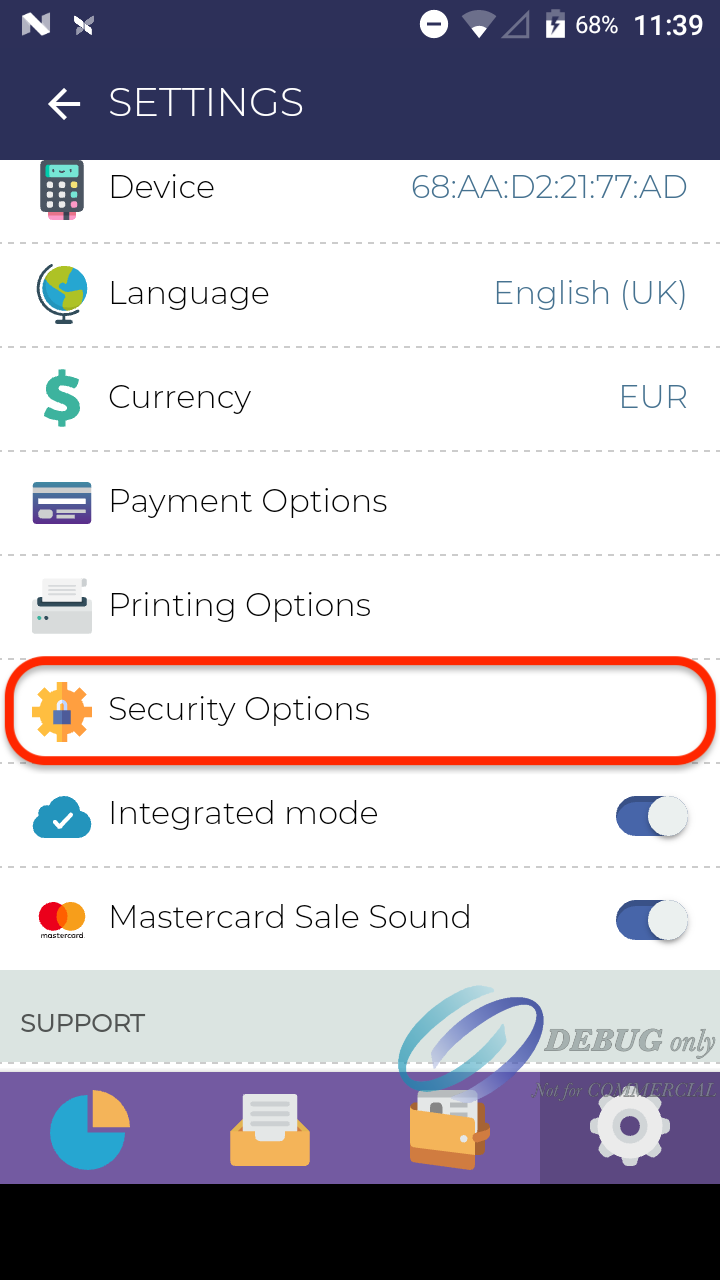
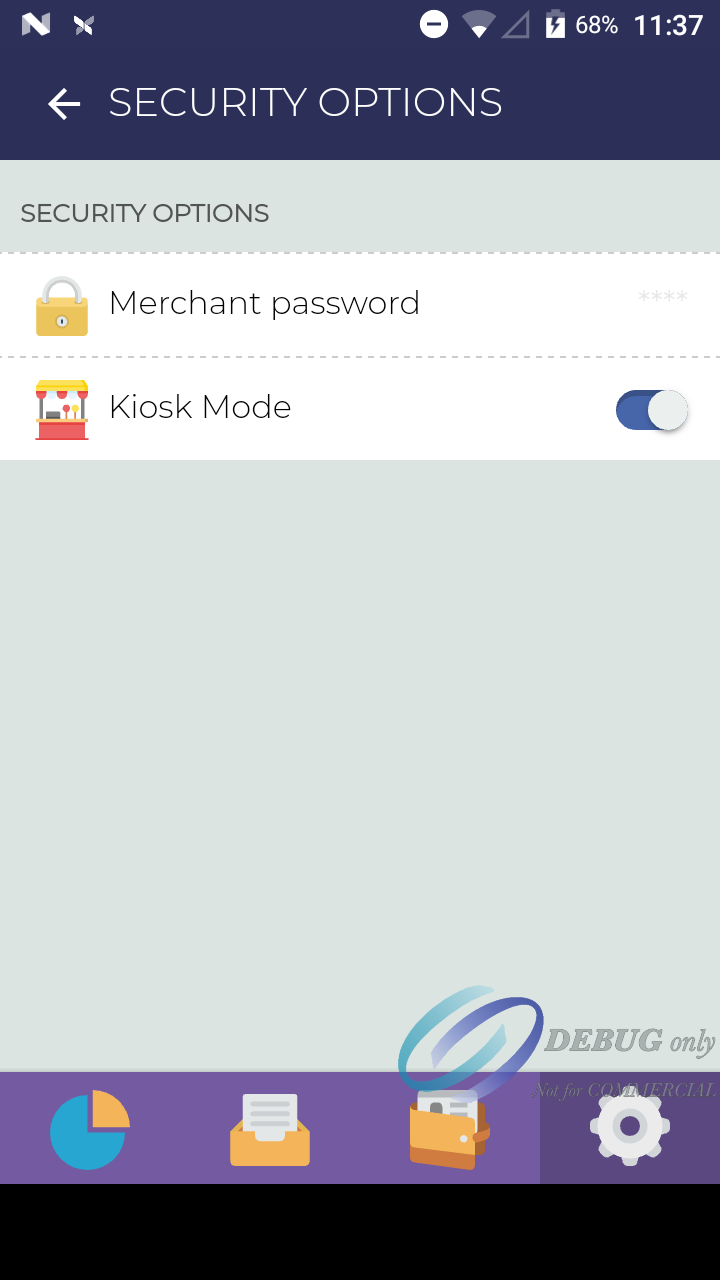
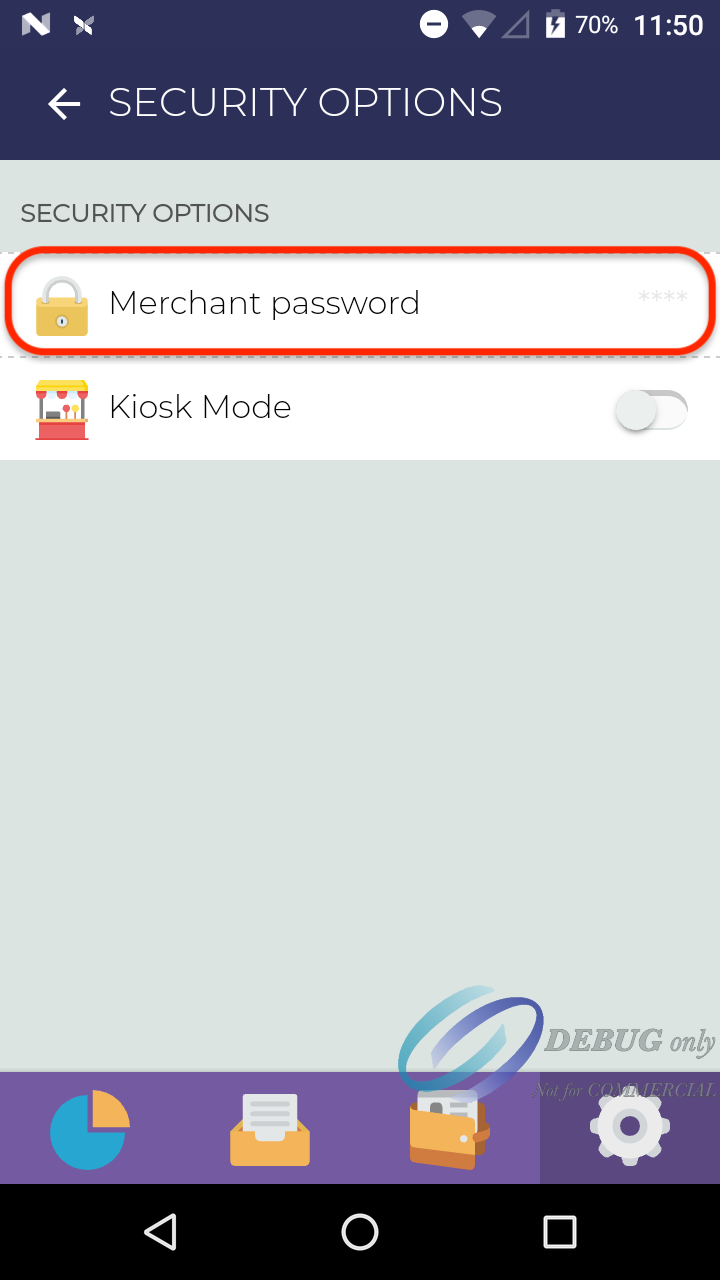
To enable kiosk mode you must go to the Settings tab (cogwheel). Once you are in Settings, there is an option called Security Options. By clicking on Security Options you will be able to enable kiosk mode and/or change your merchant password.
Once kiosk mode is activated, the three Android native buttons will disappear, preventing a user from minimizing the app and closing it. Navigating between the menus of the application at the bottom of the screen will not be possible either.
When clicking on the Settings, Analytics or Transactions tab, the merchant password will be required.
How can I change the merchant password?
To change the password you can go to the Settings tab (cogwheel) and click on Security Options.
By clicking on the Merchant password option you will be able to change it. Please note that the old password will be required.
Note: If the old password is forgotten, you must contact your service provider who will be able to reset it remotely.
Duplicate Payment check
We are introducing a new feature in our TWPayz payment application (v4.0.1) duplicate payment check.
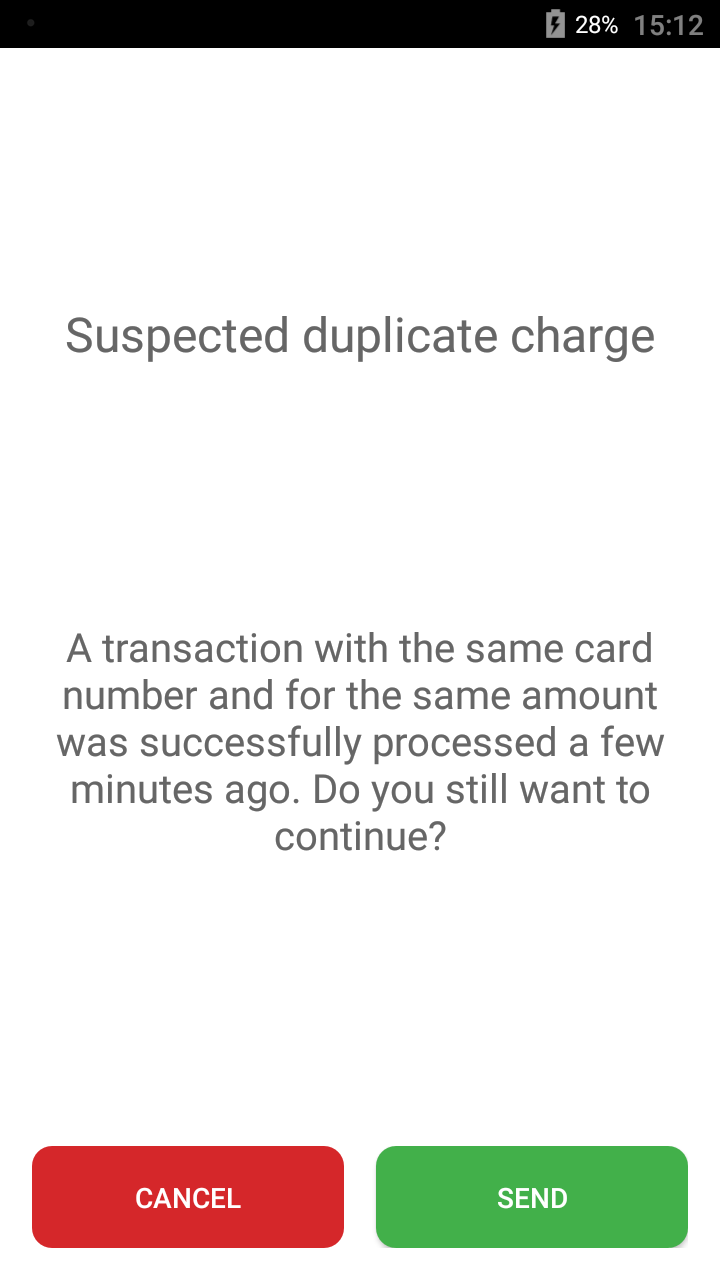
Looking back at our data we have seen that when a merchant is not 100% sure of the transaction outcome, for example, the terminal showed an approval but the POS did not pick up the result, they will reprocess the transaction leading to the cardholder being charged twice. In order to avoid this scenario, we are now flagging the duplicate transaction and prompting a menu to the cardholder/merchant to confirm/cancel the 2nd charge.
We are only prompting the duplicate menu in case the same card is used twice in a row to process a transaction for the same amount within a 5 minutes timeframe. The duplicate payment check feature will be enabled by default in the TWPayz payment application v4.0.1.
For the TWPayz application in Standalone Mode, the duplicate check feature can be disabled through the Settings of the application. To disable this functionality, go to app Settings → Payment Options → Switch off the Duplicate charge alert
If the application is used in Integrated Mode, the duplicate payment check feature will be enabled by default in the TWPayz payment application 4.0.1. If you are using the REST API, Windows SDK, Android SDK or JS SDK and want to disable this feature, a duplicate_check flag will be available in the sale options for them to turn it off.
Tipping Options
Under in-app settings see ‘Tipping options’ once ‘Tipping’ is enabled the tipping screen features will show.
Different options are available for Sale&Tip operations:
The tipping screen allows up to 4 different percentage tip amounts
Can enable to allow a custom amount input
Can enable a ‘Skip’ button
As well as changing the Title/header and Footer of the tipping screen.
The TIP amount selected will be charged in the same payment, however it will be separated in reporting in two fields, TotalAmount (Including Tip) and Tip Amount
How to activate a SIM card
In cases where the WiFi connection is not very good/stable or in areas where it is not possible to connect to a WiFi network, the use of SIM cards* can solve the connectivity issue.
ℹ️ If you are using TWPayz provided SIM cards, here are the steps to activate them:
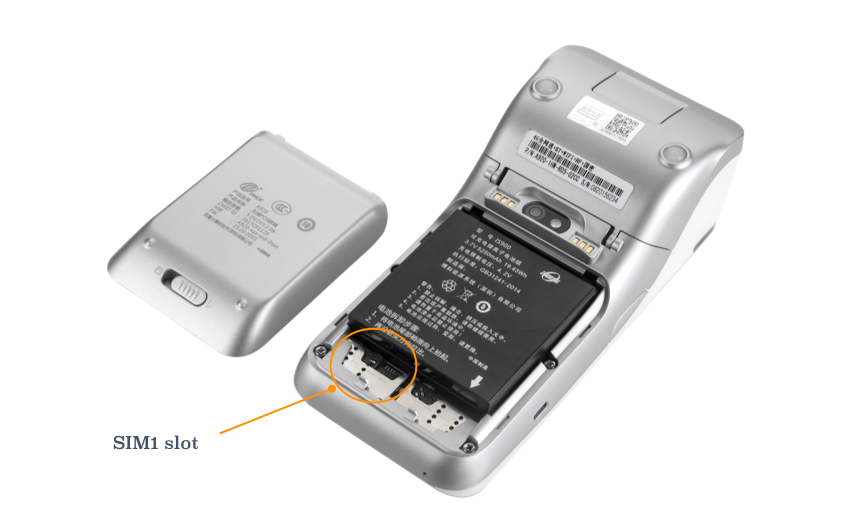
- Push the battery cover slide latch (at the back of the card reader) to the right to open, remove the battery case (lifting from the bottom) and take out the battery (also lifting from the bottom). Insert the SIM card in the SIM1 card slot (on the left-hand side) [Step 1 can be skipped if the SIM card is already inserted]
- Turn on the terminal and connect it the terminal to the WiFi.
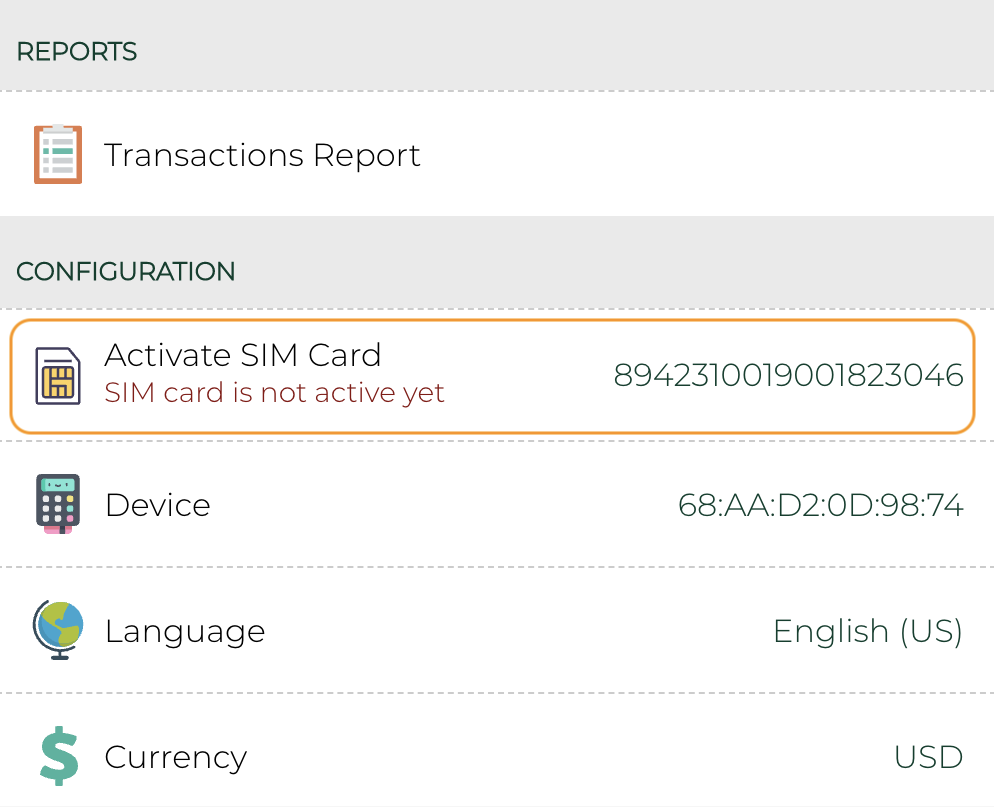
- Open the TWPayz Payments app and go to the app Settings (cogwheel).
- Click the "activate sim card" button (might require to scroll down a bit).
- At this time the device should be able to be used only with the SIM card ✅
If you have carried out the previous steps and the connectivity with SIM cards does not work correctly, we recommend carrying out the following checks:
- Make sure cellular is enabled on the payment terminal : Go to the Android settings (pwd 9876@@) -> More -> Cellular Networks -> click the check box near "Data roaming"
- Make sure that 3G/4G is not selected as the preferred network in the device settings. You can check it by going to device settings (pwd: 9876@@) Wireless —> Networks —> Mobile networks —> Preferred network type —> 4G preferred (These steps may vary a bit depending on the version).
⚠️ warning In case you are not using TWPayz’s provided SIM cards, here are the steps to follow:
- Push the battery cover slide latch (at the back of the card reader) to the right to open, remove the battery case (lifting from the bottom) and take out the battery (also lifting from the bottom). Insert the SIM card in the SIM1 card slot (on the left-hand side)
- Make sure cellular is enabled on the payment terminal : Go to the Android settings (pwd 9876@@) -> More -> Cellular Networks -> click the check box near "Data roaming"
- Make sure that 3G/4G is not selected as the preferred network in the device settings. You can check it by going to device settings (pwd: 9876@@) Wireless —> Networks —> Mobile networks —> Preferred network type —> 4G preferred (These steps may vary a bit depending on the version of used).
- Make sure that the SIM APN settings [Device settings (pwd: 9876@@) Wireless —> Networks —> Mobile networks —> Access Point Names] are correctly set up on the terminal.
- Make sure that the SIM inserted in the terminal still has data available for transactions.
- If the merchant has a not very reliable WiFi, perhaps the best option would be to forget the WiFi network to prevent the device from connecting to this network since considers WiFi as primary before the SIM card connection. Forgetting the merchant's known network, the device will only use the SIM card, ensuring a better internet connection.
*Please check if your reader supports the use of SIM card.